
Quick Answer
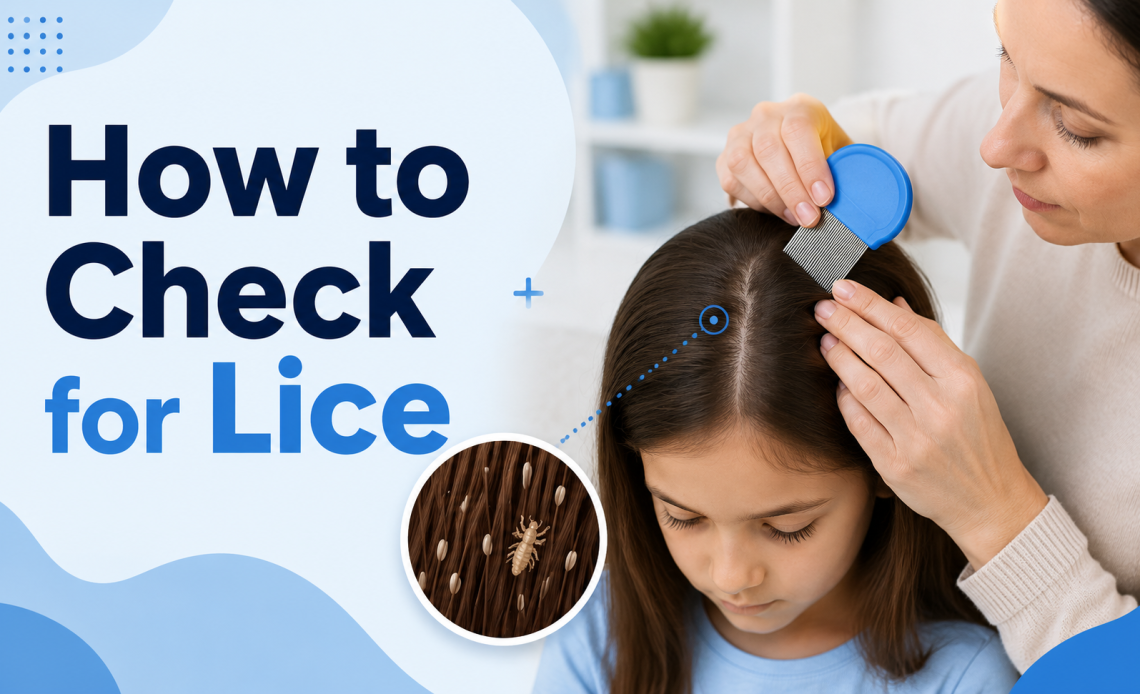
The most reliable way to check for lice is to dampen the hair, section it into small parts, run a fine-tooth nit comb from scalp to tip through each section, and wipe the comb on a white paper towel after each pass. If you are wondering how to check for lice, look for small brownish moving insects or tiny oval eggs stuck firmly to individual hair shafts. The key areas to check are behind the ears and at the nape of the neck, where lice prefer to hide. The whole process takes about 10 to 30 minutes depending on hair length.
At a Glance
| Detail | Information |
| What You Are Looking For | Live lice (tan to brown, sesame seed sized, moves quickly) and nits (oval, yellowish, stuck firmly to hair shaft) |
| Where to Start | Behind the ears and the nape of the neck, the warmest areas closest to the scalp |
| How Close to the Scalp | Most lice live within a quarter inch of the scalp |
| Key Tool | Fine-tooth nit comb plus white paper towel to wipe the comb after each pass |
| How Long It Takes | 10 to 30 minutes depending on hair thickness and length |
| When to Recheck After Exposure | Daily for at least two weeks following a confirmed or suspected exposure |
What Do Lice Actually Look Like?
Live lice are tiny insects, about the size of a sesame seed, roughly 2 to 3 millimeters long. They appear tan, brown, or grayish and have six legs with claws designed to grip tightly to hair shafts.
The most important thing to know about spotting live lice is that they move fast. When hair is parted and light hits the scalp, lice scatter quickly. This is one reason many people check hair without finding lice even when they are present.
Nits, which are lice eggs, are the more reliable thing to find. They are tiny, oval-shaped, usually yellowish or translucent, and glued firmly to one side of the hair shaft about a quarter inch from the scalp. They do not flake off with a brush. They do not move. You have to slide them down the hair shaft with your fingernails to remove them, and they often make a small clicking sound when they come loose.
What Is the Difference Between Nits and Dandruff?
This is where most people get confused. The key test is attachment:
| Feature | Nits | Dandruff | Other Debris |
| Shape | Oval, teardrop shaped, consistent | Irregular flakes | Irregular, varies |
| Attachment | Firmly glued to one side of the hair shaft | Falls off easily with brushing | Usually brushes off easily |
| Location | Within about a quarter inch of the scalp | Anywhere on scalp or loose in hair | Can be anywhere |
| Color | Yellowish, translucent, or white when empty | White or yellowish scales | Variable |
| Feel | Slightly sticky or solid, makes a clicking sound when removed | Flaky, no resistance | No resistance |
When in doubt, try to flick the speck off the hair shaft with your fingernail. If it does not move without real effort, treat it as a nit until confirmed otherwise.
What Tools Do You Actually Need to Check Properly?
- A fine-tooth nit comb: metal nit combs are significantly more effective than plastic ones. The teeth need to be close enough together to catch nits, which are smaller than most people expect.
- A bright light source: a flashlight, a ring light, or natural sunlight works best. Overhead bathroom lighting is usually not strong enough to see nits clearly.
- White paper towels or a white cloth: wiping the comb on a white surface after each pass makes lice and nits dramatically easier to see against the background.
- Hair clips or ties: for sectioning the hair and keeping checked sections separate from unchecked sections.
- A magnifying glass or your phone camera: zoom in on anything suspicious before deciding whether it is a nit or debris. Phone cameras work surprisingly well in macro mode.
- A shallow bowl of water (optional): dipping the comb in water between passes can also help you see what is on it.
How Do You Check for Lice Step by Step?
- Step 1, dampen the hair: slightly damp hair slows lice down and makes them easier to catch. It also makes the fine-tooth comb easier to run through without pulling or tugging.
- Step 2, detangle first: run a regular wide-tooth comb through the hair to remove tangles before starting the nit comb. Starting on tangled hair makes the process harder and less thorough.
- Step 3, section the hair: divide hair into small sections, about 1 to 2 inches wide, using clips. Work through the whole head systematically. Do not skip sections.
- Step 4, start at the nape of the neck and behind the ears: these are the warmest spots on the scalp and where lice prefer to feed and lay eggs. Always start here before moving to other areas.
- Step 5, comb from scalp to tip: press the comb as close to the scalp as possible and draw it slowly from root to end in one smooth stroke. Do not rush this step.
- Step 6, wipe and examine the comb after every single pass: wipe the comb on a white paper towel after each stroke and look carefully at what came off. Live lice will appear as small moving dots. Nits will look like tiny oval specks attached to hair strands.
- Step 7, repeat in multiple directions: comb each section up and down, left to right, and diagonally. Nits and lice can sit at different angles and a single-direction comb pass misses some of them.
- Step 8, check every section before declaring clear: go through the entire scalp before concluding the check. Lice can be missed in a partial check.
Where on the Head Do Lice Hide Most?
Lice need warmth and the blood supply close to the scalp to survive and reproduce. That means they concentrate in specific zones rather than spreading evenly across the head.
- Behind the ears, particularly in the fold where the ear meets the scalp
- The nape of the neck, especially along the hairline
- The crown of the head
- Along the hairline at the forehead and temples
The CDC confirms that lice are rarely found more than a few inches from the scalp because they cannot survive long away from their food source. Checking only the ends of long hair is a common mistake that produces false negative results.
How Do You Check Yourself for Lice When No One Can Help?
Checking your own scalp is genuinely difficult, particularly for the nape of the neck and the crown, which are nearly impossible to see directly. The comb-and-white-towel method is the most reliable solo approach because you are reading the evidence on the towel rather than trying to see your own scalp.
Setting up two mirrors facing each other can help you see the back of your head, but the comb method gives more reliable results than visual inspection alone. A lighted magnifying glass or a phone propped to film your scalp can also help.
If you are genuinely uncertain after checking yourself, a professional lice check or a trusted person doing a second look is worth the time. The nape and crown are the hardest zones to clear without a second set of eyes.
How Do You Check a Child for Lice Without Making It Stressful?
Having the child sit in a non-upholstered chair makes the process easier. If lice fall during the check, they are harder to find on fabric. Position yourself so you can move around the head without the child needing to tilt uncomfortably.
Making the check a routine rather than an emergency response helps significantly. According to the Center for Lice Control, doing a quick comb check every other week is the most effective way to catch an infestation early, before it has spread and while it is easiest to treat.
Distraction during the check, a short show, a podcast, or a simple conversation, makes the sitting-still part considerably easier for younger children.
Does an Itchy Scalp Definitely Mean Lice?
No, and this is an important point. The CDC states clearly that misdiagnosis of head lice is common, and an itchy scalp has multiple possible causes including dry skin, dandruff, eczema, or an allergic reaction to a hair care product.
Equally important is the reverse: not itching does not mean no lice. With a first case of head lice, itching may not develop for 4 to 6 weeks after the initial infestation begins. The itching is an allergic reaction to lice saliva, and some people never develop a significant reaction at all.
This is why the CDC recommends that the diagnosis of head lice should be confirmed by finding a live nymph or adult louse on the scalp or hair, not by symptoms alone.
How Long After an Exposure Should You Check?
Check as soon as you become aware of a possible exposure. If the initial check comes back clear, recheck daily for at least two weeks. Nits take 8 to 9 days to hatch, which means a check done the day after exposure may be clear even if transmission occurred.
If a child in a household is confirmed to have lice, all members of the household should be checked on the same day, not just the child with symptoms. Lice spread through direct head-to-head contact, and household transmission is common before the original case is identified.
What Are Super Lice and Do They Look Different?
Super lice are lice that have developed resistance to the active ingredients in many traditional over-the-counter lice shampoos, particularly permethrin-based treatments. They look identical to regular lice on inspection and cannot be distinguished visually.
The resistance issue is relevant when it comes to treatment, not detection. If you treat with an over-the-counter product and live lice are still present 24 hours later, resistance is a likely explanation. Prescription options or alternative approaches such as wet combing without chemical treatment, or products containing different active ingredients like spinosad or ivermectin, are more likely to be effective against resistant strains.
What Should You Do If You Find Lice?
- Confirm the finding before treating: make sure what you found is actually a louse or viable nit. Treating without confirmation means unnecessary chemical exposure.
- Check all household members the same day: treat any confirmed cases simultaneously to avoid reinfestation from an untreated household member.
- Choose a treatment approach: over-the-counter permethrin products, prescription treatments, or thorough manual removal with a nit comb over several sessions are the main options. If OTC treatments have not worked before, skip straight to a prescription option or alternative.
- Follow up with a comb check 24 hours after treatment: if live lice are still present, the treatment may not have been effective and a different approach is needed.
- Recheck every few days for two to three weeks: treatment does not always kill all nits. Eggs that survive can hatch into a new generation about 8 to 9 days after treatment, which is why follow-up combing matters as much as the initial treatment.
- Notify close contacts: schools and parents of children who have had direct contact with your child in the past few days should be informed so they can check.
What Do Most People Get Wrong When Checking for Lice?
Most people look for movement first and spend time trying to spot lice crawling on the scalp. Since lice scatter quickly when exposed to light and are very small, this approach produces many false negatives.
The comb-and-towel method is more reliable because you are catching evidence rather than chasing insects. Nits in particular are far easier to find on a white paper towel than on a scalp under a bathroom light.
A second common error is only checking the sections the person is scratching most. Lice spread across the whole scalp, and a partial check routinely misses active infestations that are concentrated elsewhere on the head.
The Three Zone Check That Covers the Highest-Risk Areas
When time is short or you are doing a quick routine check rather than a full inspection, prioritize these three zones in order:
- Zone One, the nape: the hairline along the back of the neck, both at the center and behind the ears. This is where most infestations start.
- Zone Two, the crown: the top of the head, where nits are laid when lice travel away from the nape.
- Zone Three, the temples and forehead hairline: especially in children, who touch these areas frequently.
A full head check remains the gold standard for accuracy. The three zone approach is a screening tool, not a replacement for a complete check when there is a confirmed exposure.
What Should You Do Right Now?
If there is a known exposure at school or camp, check today using the comb-and-towel method, starting at the nape and behind the ears. Plan to recheck every day for two weeks if the initial check is clear.
If you find nits or live lice, check all household members the same day and begin treatment. Do not delay treatment while waiting for symptoms to appear in others.
Avoid treating without confirming a louse or nit first. Applying treatment to a clear scalp is unnecessary and exposes the child to chemicals without benefit.
Suggested Internal Links
Add these once matching pages exist on your site, using descriptive anchor text:
- Link to a lice treatment guide using anchor text like “how to treat lice at home after confirming an infestation”
- Link to a super lice guide using anchor text like “what are super lice and which treatments actually work”
- Link to a school outbreak guide using anchor text like “what to do when there is a lice outbreak at school”